Enhancing portraits in Paint Shop Pro
Portraits can often be improved with selective blurring.
First, blurring the background gets rid of distracting detail. Large format photographers can do this by controlling depth of field, but digital cameras have so much depth of field that little can be done at photo time.
Second, most of us have a few blemishes on a given day that we would rather hide. Selective blurring can help here, too.
Below is a step-by-step guide to portrait enhancement using Paint Shop Pro. Any good photo package that supports layers can probably do similar things.
| Here is the original. A striking portrait of my friend's neice, but even an excellent portrait can benefit from some tweaking. | 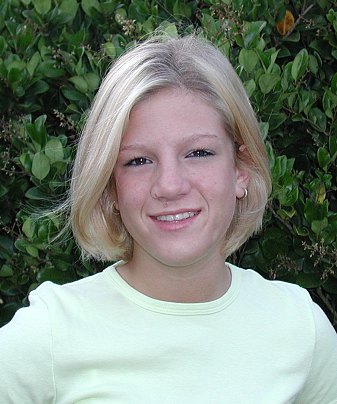 |
| 1. Use clone brush to get rid of main blemishes. |  |
|
2. Next, select Layers > Duplicate. |
 |
|
4. Select the eraser tool. In the tool options
palette, set Hardness=0, size = 15, opacity = 50, build-up checked.
This makes a "soft" eraser that takes a little with each stroke. 5. Erase eyes, eyebrows, mouth and lips, ears and earring, nostrils. This lets the sharp bottom layer show through at these spots. An old adage is that if the eyes are sharp, most people will consider the photo sharp. We are already that far. 6. Cut eraser size down to 9 or so. Erase all the edges between what you want sharp and what you want blurry: along chin line, outside edge of hair, edge between blouse and neck, edges of neck. I mostly just make a single pass with the eraser. Since the opacity is 50 per cent, this does not completely erase the blurry layer, but it lets enough of the sharp layer through to give a well defined, though soft, edge. |
 |
|
Here is just the blurry layer from the above image, so you can see clearly where I have erased. I have saved one version of the PSP file at this stage so you can see what I have done, mg1.psp. In the Layers palette, click on the "eyeglasses" in the bottom layer, and you can see exactly what I have erased of the blurry layer to this point. Clicking on the eyeglasses makes the bottom layer invisible, so you are seeing only what is left of the top blurry layer. Clicking again shows you the full image. |
 |
|
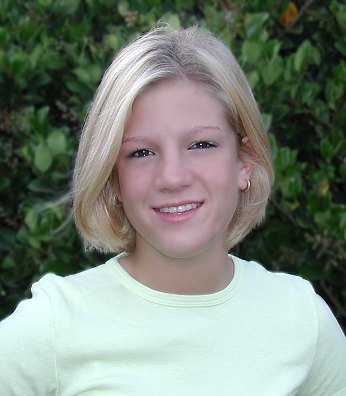
7. With the edges taken care of, you can crank up the eraser size and hardness to make it easier to erase the blurry hair and blouse. I go for a hardness of 80 and a size of 25 - 100. Erase blurry hair and blouse. This gives the final image, as shown at right. The PSP file of the full size image is available, mg2.psp. |
 |
| At right is just the blurry layer of the final image. |  |
That's it!
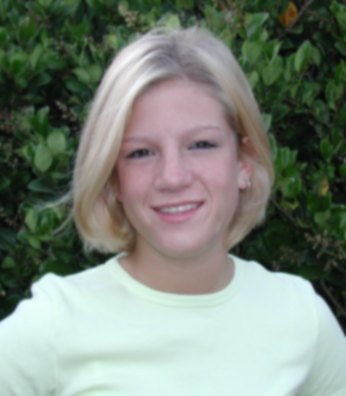
Here are the initial and final images side by side.
|
|
I have chosen to leave the background blurry, since it is less distracting that way. If you prefer a sharp background, just erase the background area of the blurry layer.
[an error occurred while processing this directive] [an error occurred while processing this directive]