Panoramas
I have recently discovered the joy of panorama stitching software. This software does a remarkable job of stitching overlapping images into a panorama. The task the software handles (invisibly) is more complex than I first imagined. The software must correct for perspective distortion, match exposures, as well as align images.
Below is one of my first attempts. I achieved this result from six shots taken without a tripod or monopod. I used Panorama Factory. Click on any image for a larger version.
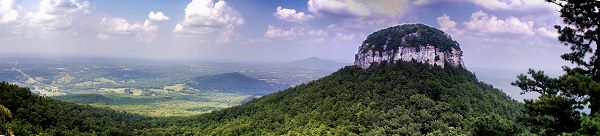
I later bought a monopod, which I used for the shot below. Monopods are light, compact, and can double as a walking stick. More importantly, they really make aligning shots for panoramas easy. The panorama below was taken using a monopod, and MGI Photovista was used for stitching the images:

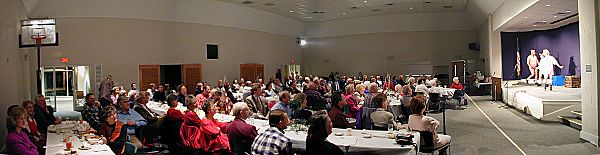
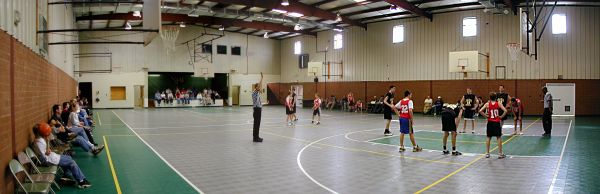
MGI Photovista is particularly good at handling images that include moving people in the overlap areas. Here are two constructed using this software. Both were taken without benefit of tripod or monopod. Click each image for a larger version.
Here is one more handheld panorama. This one was shot in 40 mile/hr winds with a Kodak disposable film camera. I asked for a Kodak Picture CD when the film was processed.

For a review of panorama software, see http://www.panoguide.com. I use Panorama Factory, MGI Photovista, and PanoTools with the PTGui front end.
- I have found that Photovista handles images with people best and is the fastest of these three. It is my favorite. Tip: shooting photos with 50% overlap gives better results than smaller overlaps.
- Panorama Factory has a free version as well as a very nice commercial version.
- PTGui, available for free, is the most work of the bunch by far; I use it only on those images for which the other two packages fail. You must pick out matching points manually in the overlap region. These are typically images where I have changed camera pitch from shot to shot. This package is very powerful, but is not automatic. I have only had a couple of sequences where I needed this, sequences where I was shooting handheld and trying to rotate about a tilted axis. I never need this if using a monopod, even when rotating about a tilted axis.
Printing
You can upload and print your panoramas at http://www.ezprints.com. They will print in six inch and twelve inch widths, in whatever length the image demands. Prices are low and the quality is good.
Monopod technique
I had some hesitation in including this section, for fear that a section on technique would discourage some folks from just jumping in and getting started with panoramas. You can get good panoramas without much care. Three of the four images above were taken handheld, and I think they're pretty good!
However, a monopod makes good panoramas easier, and the method below takes much longer to describe than to use. There is only one goal: keep the monopod head stationary in space as you rotate it about a fixed axis.
While one can easily shot 360 degree panoramas, most of the time I am interested in only about 120 - 160 degrees. For these, I can shoot the whole sequence without moving my body. The goal of this technique is to avoid lateral movement of the camera. If the head of the monopod stays in roughly one spot as you rotate, your panoramas will be absolutely fantastic.
- I choose a stance facing the center of scene, and turn on the LCD viewfinder.
- I hold the monopod grip in my left hand, and grasp the camera and shutter in my right. Henceforth, my left arm and hand never move. I just loosen my grip on the monopod when I rotate the camera.
- I point at a region of typical illumination, usually the center of the scene, and give the shutter a half-press to lock exposure. (This is not necessary, but sometimes improves the results.)
- At this point I loosen my left hand's grip on the monopod and rotate the camera to the first, leftmost shot.
- For each shot , I grip, shoot, loosen left hand, rotate, and then repeat.
I like around 50% overlap of shots. Why so much?
- MGI Photovista searches the overlap region for a line (not necessarily straight) of minimum movement between shots. Giving it more overlap region to work with makes this approach more effective.
- Panorama Factory, on the other hand, uses a smooth blend of the two images in the overlap region. A moving person in the overlap regions shows up as a ghost. You can always manually reduce the blend region to any portion of the overlap region in Panorama Factory, so having more overlap means that it is easier to find an overlap region with no movement from shot to shot.
Do not take the above instructions to mean that meticulous care is required for acceptable results. On all but the second, I used no monopod, just held the camera to my face and rotated my body from shot to shot. This works reasonably well as long as you hold the camera level. (I was surprised to find that when shooting handheld, I consistently tilt the camera about 1.3 degrees to the left. The stitching software handles this well, but the resulting panorama ends up rising from left to right as the images "stair-step". I use Paint Shop Pro to rotate the panorama exactly horizontal.)
[an error occurred while processing this directive] [an error occurred while processing this directive]